This post may contain affiliate links. This means I will make a commission at no extra cost to you should you click through and make a purchase. Read the full disclosure here
Let’s get your beautiful pixel art that you’ve made on Procreate social media ready! You might have finished making pixel art on Procreate after having checked out my article How to Use Procreate for Pixel Art: A Quick Guide! Or you have been making pixel art in Procreate for some time and are ready to show your art on social media and with friends! If you have already tried exporting without following the correct steps, you likely ended up with blurry pixel art. Whichever the case, let’s get started, so you can learn how to export pixel art from Procreate! And I’ve included pictures you can follow along with!
Resize your Procreate Canvas
Navigate to the canvas
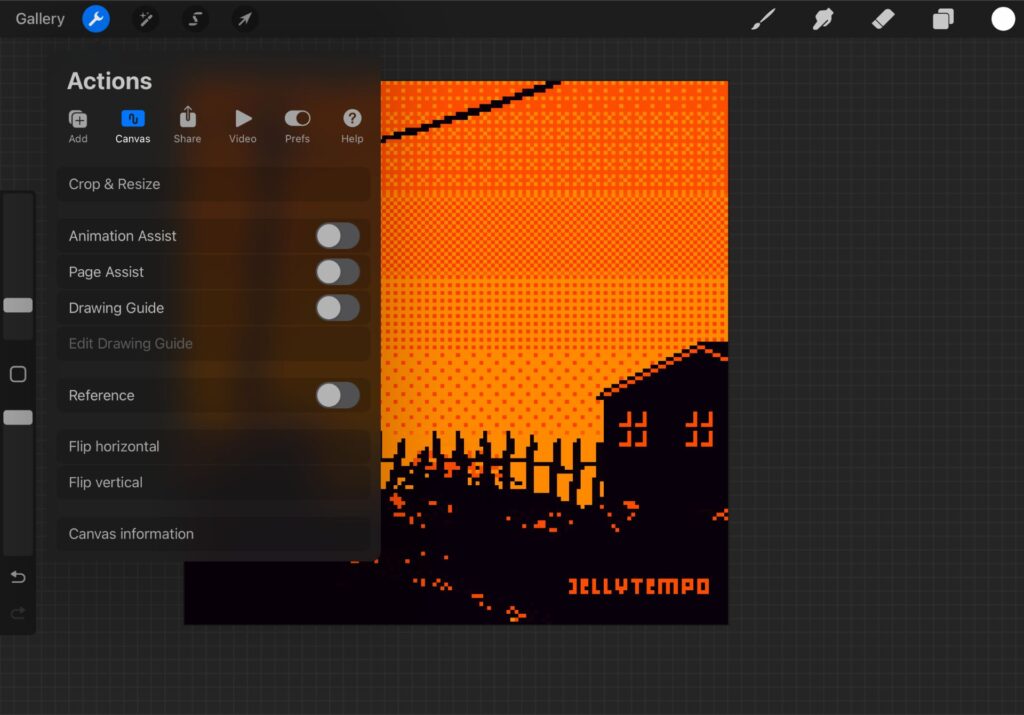
- Go to ‘Actions’ by selecting the wrench icon on the upper lefthand side of the screen
- Select ‘Canvas’ and then select ‘Crop & Resize’
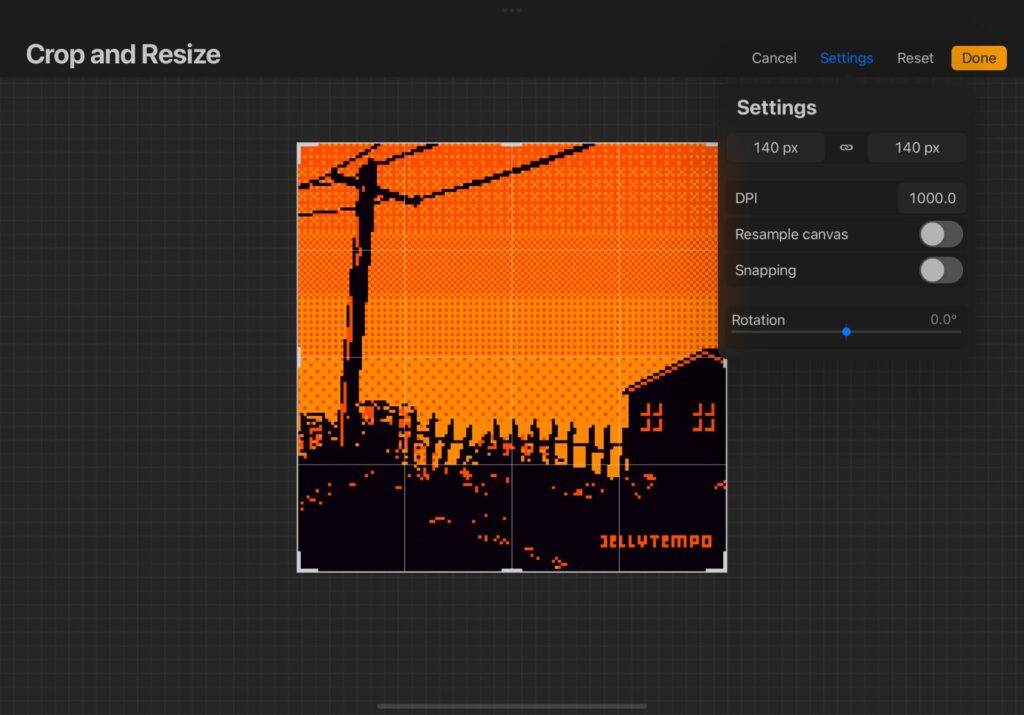
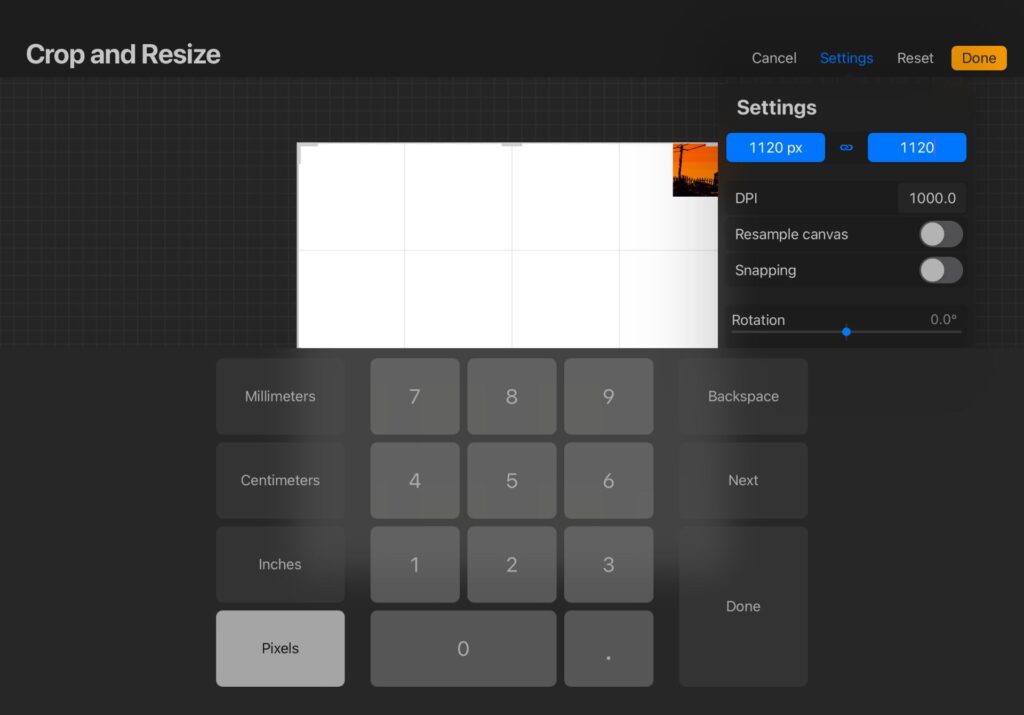
- Select ‘Settings’ in the upper righthand corner
- Make sure the link button is on, which will highlight the two sizes blue
Calculate the size you want your pixel art to be
- If you are exporting for social media, the typical square size is 1080 x 1080 pixels. This makes sense because typical resolutions for screens are 1920 x 1080
- Likely your canvas size is not a perfect divisor of 1080, meaning you cannot simply multiply your canvas size to an integer that will yield 1080. So you will need to multiply your canvas size to a number that will yield a product close enough to 1080
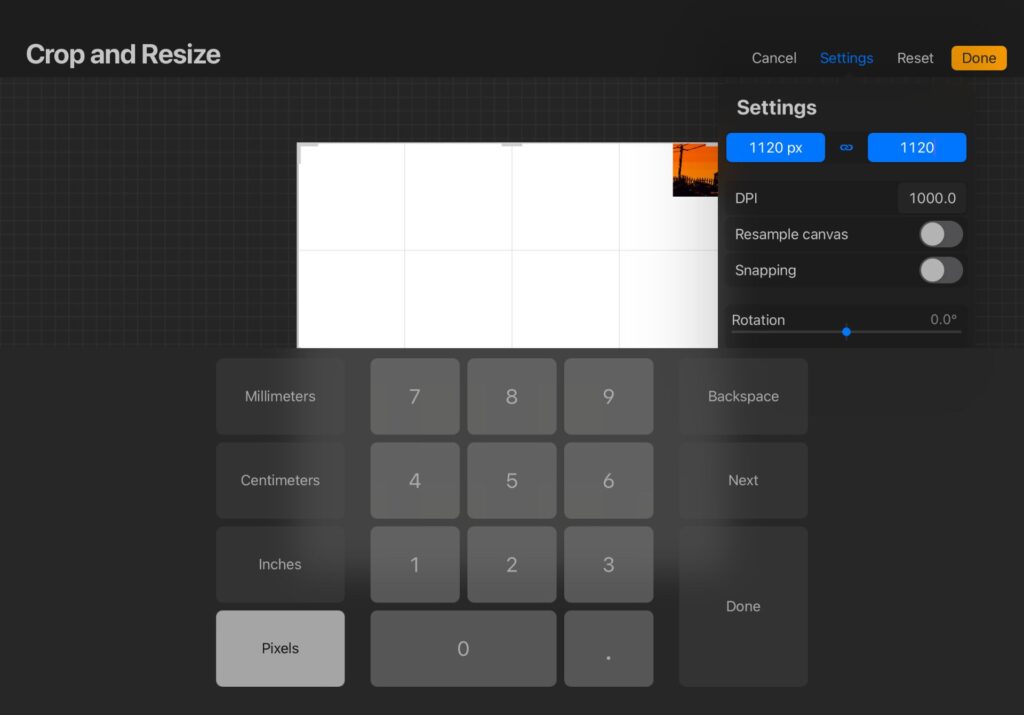
- For example, my canvas size is 140 x 140. I divided 1080 by 140, which gave about 7.7. So I am going to multiply 8 by 140 to get a canvas size of 1120. While this is larger than 1080, it will only minimally compress the image on social media or online.
- You can modify the above process to your needs if your image is a rectangle or if you want to have 4k (larger) resolution for your image
Increase the Canvas’s size
- With the canvas width and height still highlighted blue, input the number you calculated above for both height and width.
Prepare your Pixel Art layers
Group your shown layers
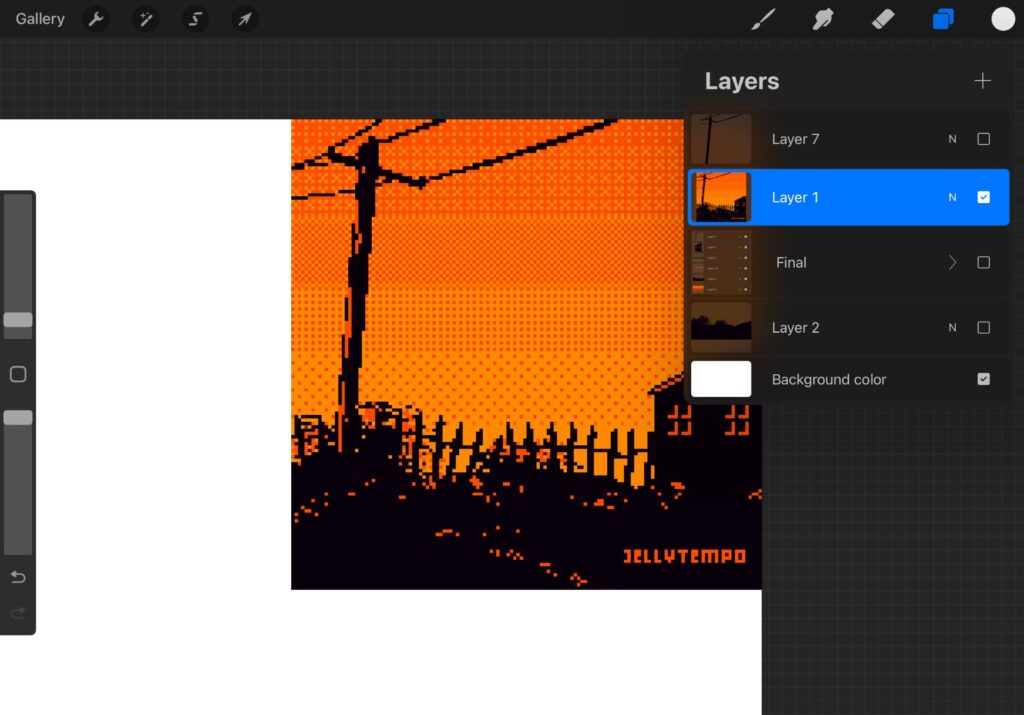
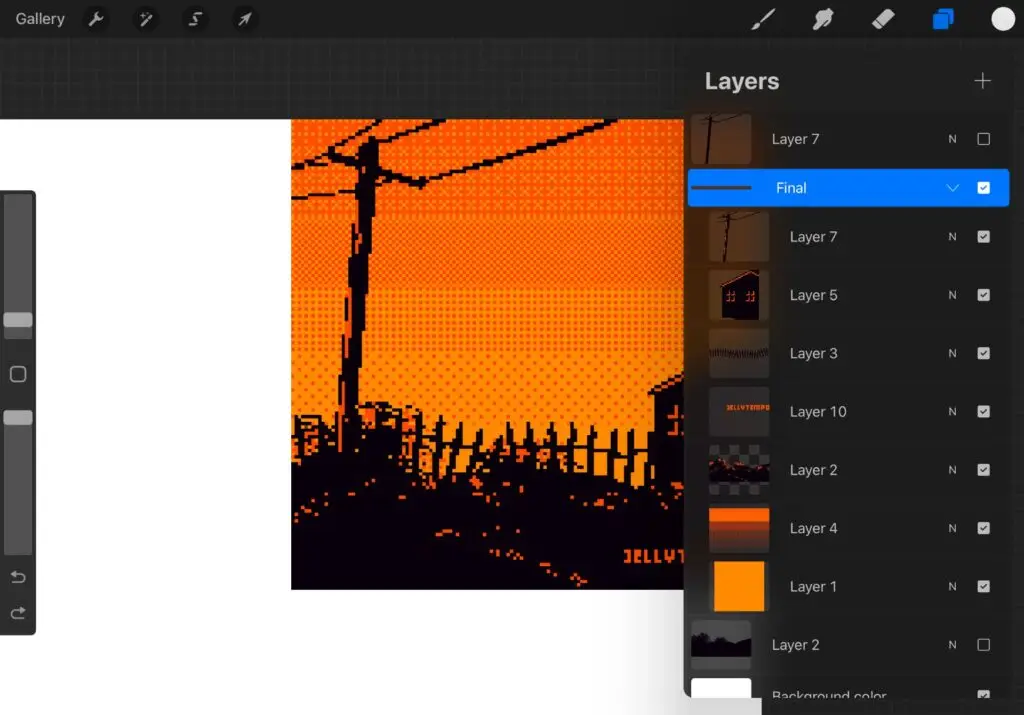
- Of the layers that are showing, you’ll want to group them all under a name that makes sense to you.
- You can create layer groups by quickly swiping right on all of the layers you want to group together and selecting ‘Group’ at the upper right corner of the layer window
- Tap the group you’ve created to rename it; select ‘Rename’ once you’ve tapped the group.
Duplicate the group
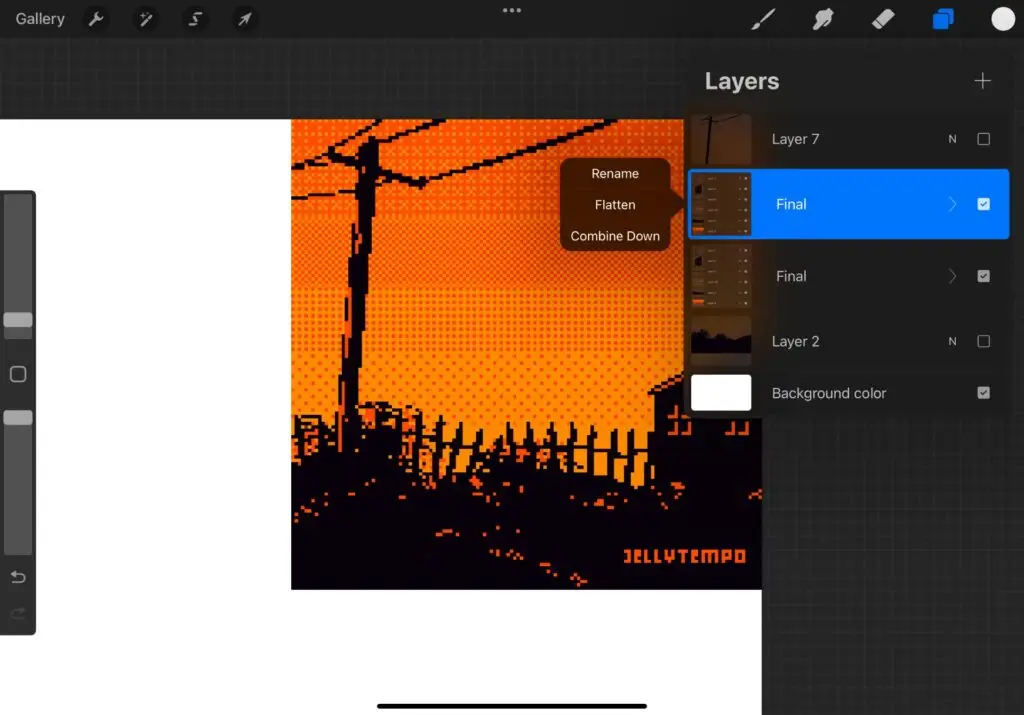
- Duplicate the group by swiping left on the group layer and selecting ‘Duplicate’
Flatten one of the groups
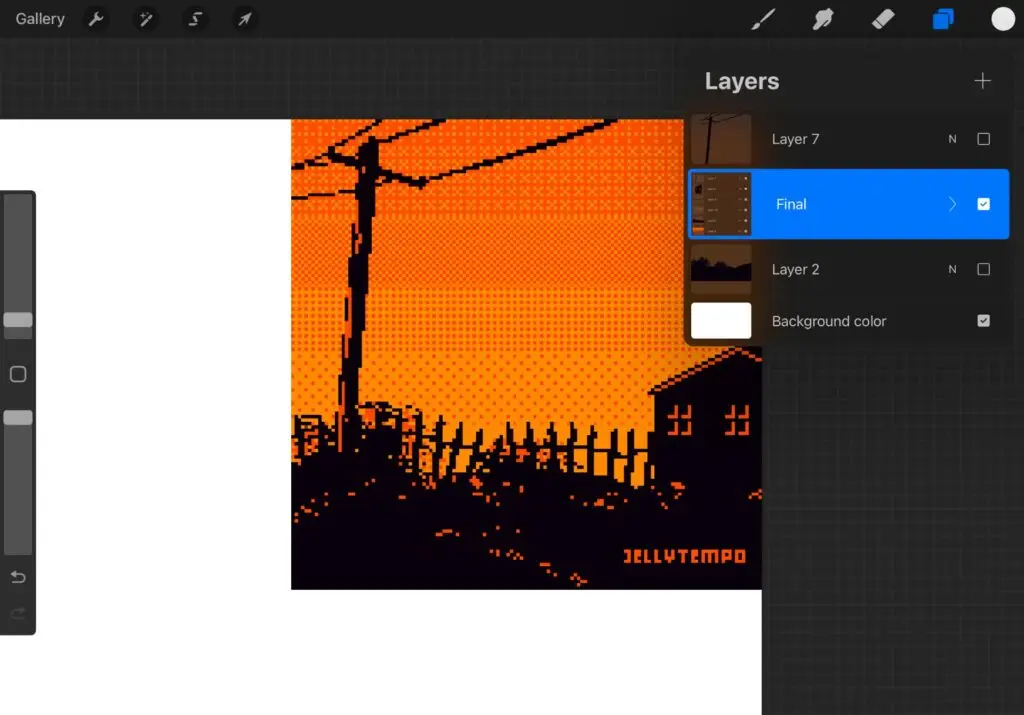
- Flatten one of the groups by tapping a group and selecting ‘Flatten’
Resize to Export Your Pixel Art From Procreate!
Navigate to transform
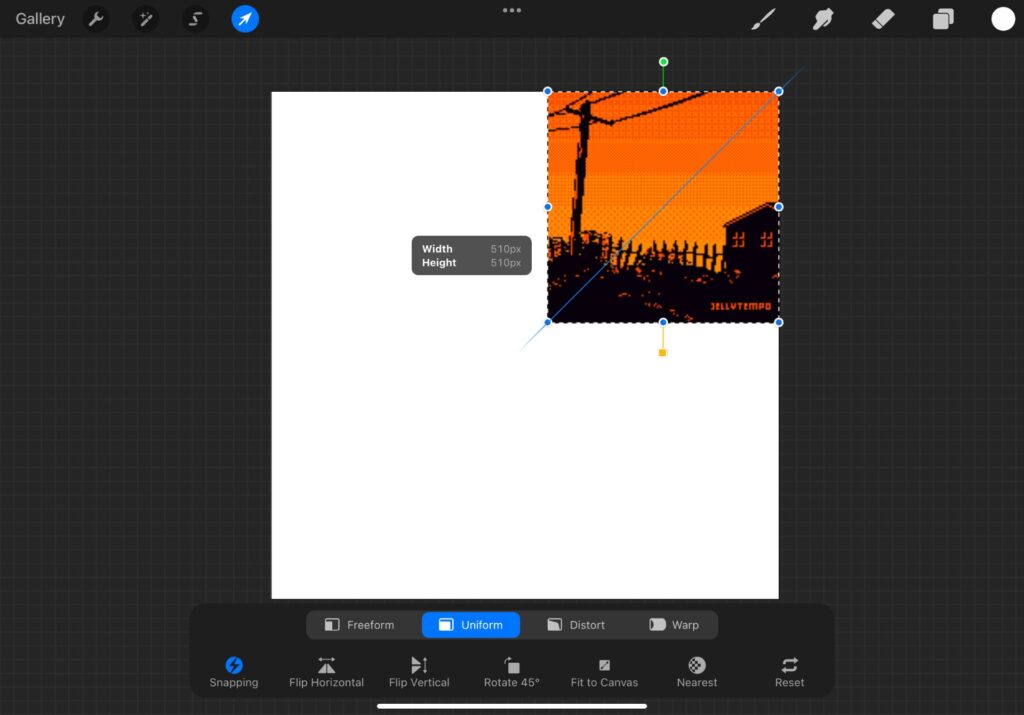
- The flattened group, will now just be a layer. This layer contains all of your visible pixel art. With only this layer selected, navigate to the transform tool
- Simply click on the upper lefthand corner the arrow symbol
- This will select the entire layer
Adjust the transform settings
- Set the transformation to ‘Uniform’
- Turn on ‘Snapping.’ You’ll know it is on because it will be highlighted blue
- THIS IS CRITICAL FOR THE PIXEL ART! Set Interpolation to ‘Nearest Neighbor’
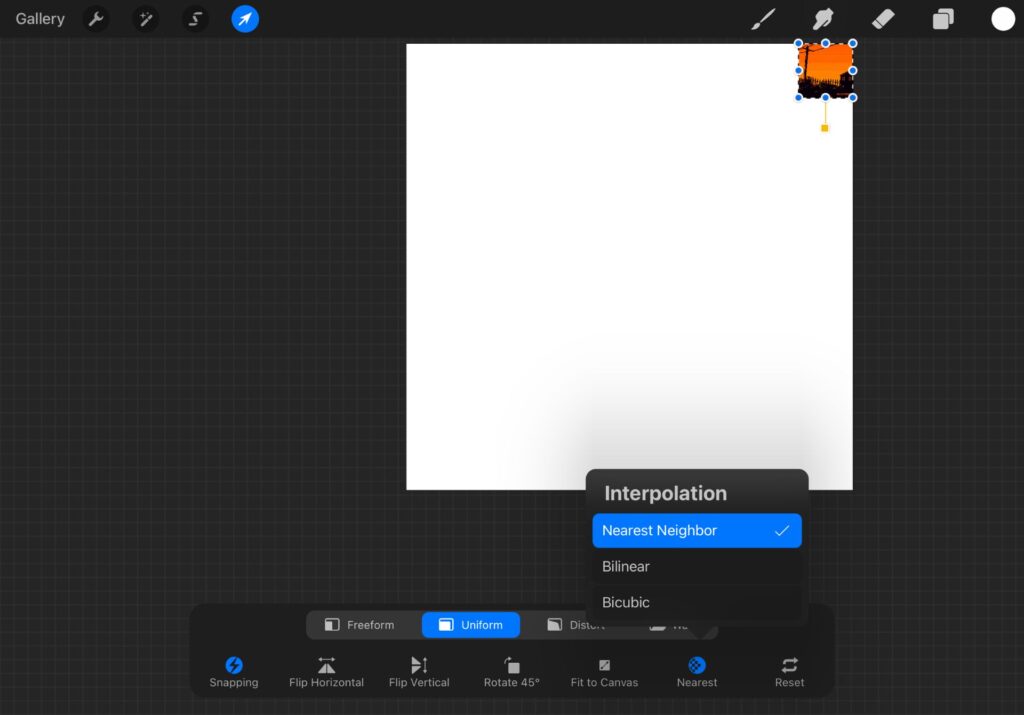
Resize!
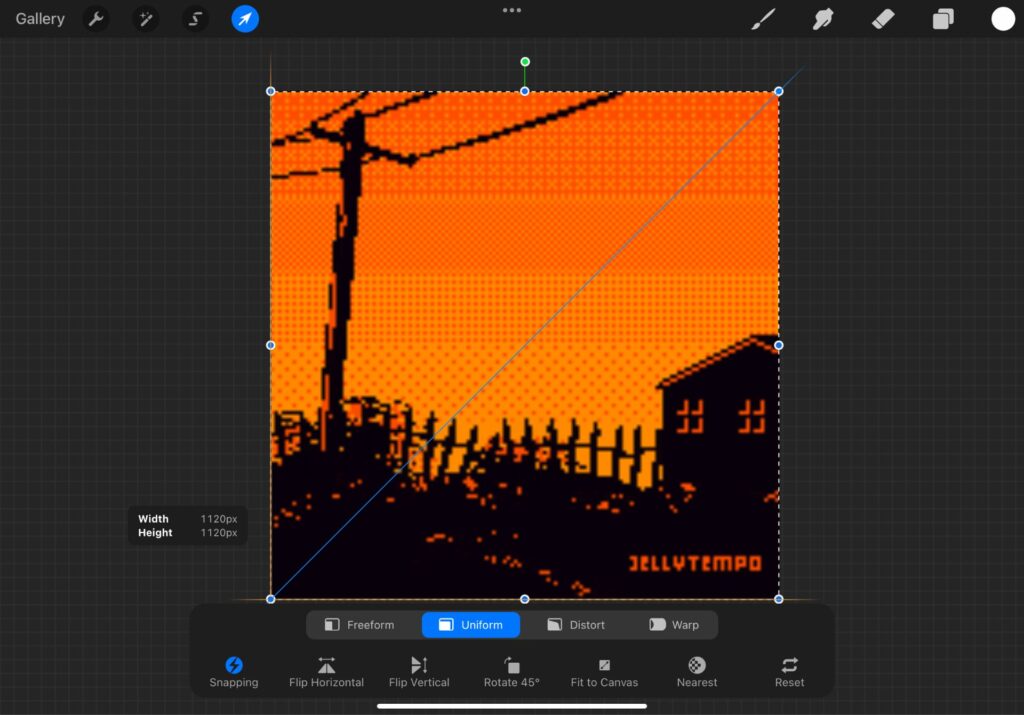
- Drag a diagonal corner of your art until it fills the canvas
- You’ll have achieved the correct size of your canvas once perpendicular yellow lines appear
- Release the resize. It will still be blurry.
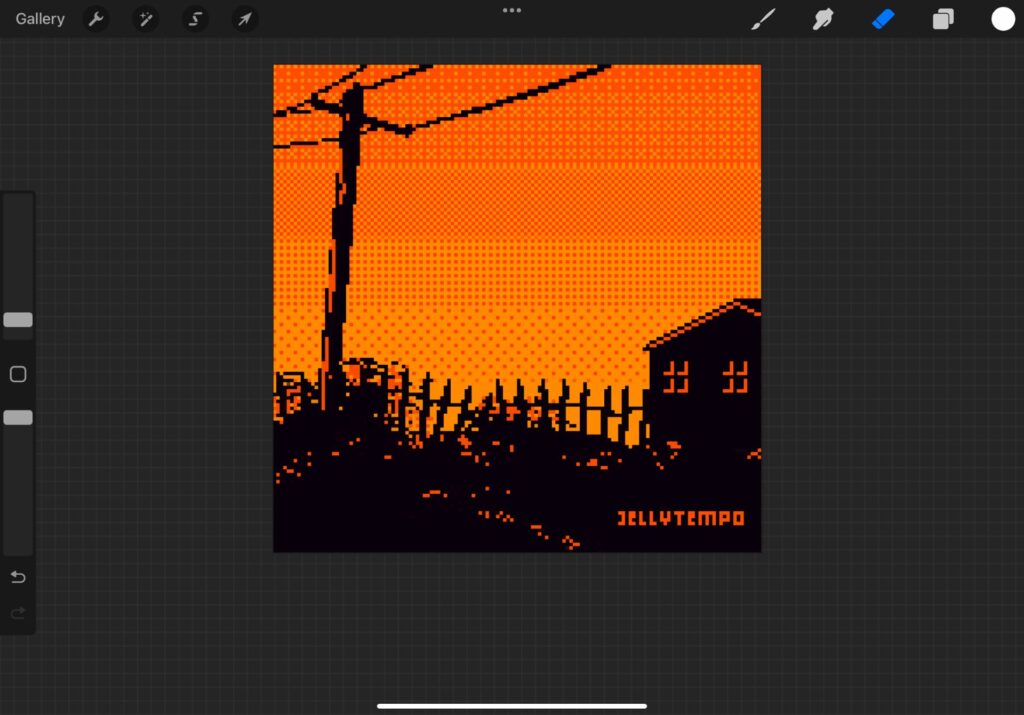
- Deselect the transform tool by selecting it, and it will now not be blue
Congratulations! You have learned how to export your pixel art from Procreate! Your image can now be shared and you can be proud of it because it doesn’t look like a blurry mess! Just share your image as a JPEG (social media’s preferred image type), and you’re ready to go! If you’re looking to ramp up your pixel art game, check out my article The Best Pixel Art Procreate Brushes (And One Pack is Free!)! And once you make enough pixel art, you might fall into the pixel artist to game developer pipeline! Once that happens, check out my article GB Studio: The Best No Code Game Engine For Beginners to get started!
